Remote Desktop on Google Cloud Platform

Introduction
Google Cloud Platform (GCP) provides scalable virtual machines (VMs) for diverse workloads. Spot VMs offer up to 91% cost savings by using preemptible resources that may be interrupted with short notice. They suit non-critical, fault-tolerant tasks like development environments or personal desktops.
This guide covers setting up a Debian-based Spot VM on GCP with GNOME Core for a lightweight desktop and XRDP for remote RDP access. You’ll get a cost-effective remote desktop accessible via any RDP client, such as Microsoft Remote Desktop on macOS or Windows.
Note: Spot VMs are preemptible and can be terminated by Google anytime if resources are needed elsewhere.
Debian with GNOME & XRDP
Debian is a stable, lightweight OS for GCP VMs, offering reliability with minimal overhead. Combined with Spot provisioning, it cuts costs by billing only for actual usage at discounted rates. GNOME Core provides essential desktop features without a full GNOME install, ideal for remote access.
XRDP serves as an RDP server, enabling seamless connections from standard clients over port 3389. It outperforms VNC in efficiency, with superior performance, clipboard sharing, and audio redirection. Use cases include remote development, GUI testing, or running graphical apps like browsers and editors on powerful cloud hardware.
Key benefits:
- Cost Savings: Spot VMs excel for intermittent use with built-in termination handling.
- Security: Use GCP firewalls to restrict RDP and SSH access.
- Flexibility: Access your VM desktop from anywhere, on any device.
Setting up VM on Google Cloud Platform
This tutorial assumes basic GCP knowledge. Start by creating a new Compute Engine instance in the GCP Console, choosing Debian or another lightweight Linux distro for stability.
Provisioning Model
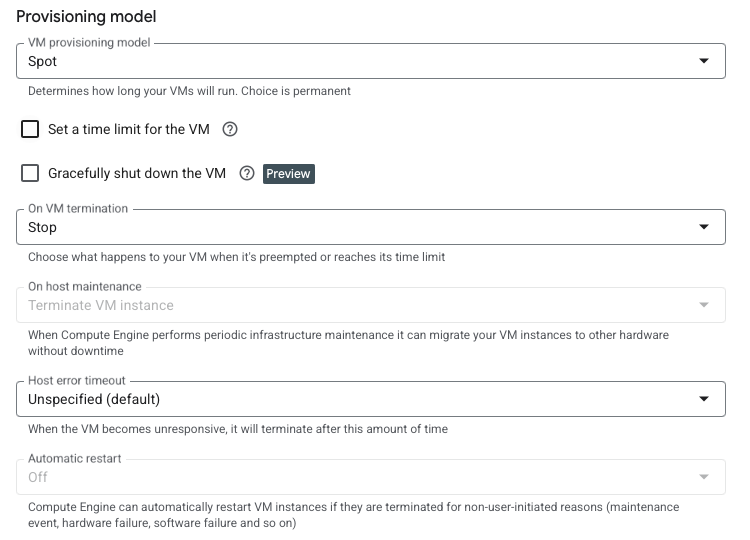
When provisioning the VM, select Standard or Spot (preemptible) models. Standard ensures uptime at full cost. Spot offers up to 91% savings with preemptible resources that GCP can reclaim anytime—ideal for non-critical workloads. We’ll use Spot for budget-friendly access.
Networking and Firewall Rules
GCP uses Virtual Private Cloud (VPC) networks for isolated, scalable environments, akin to virtual networks. Define subnets, routes, and firewall rules. Each project has a default VPC for simple setups like this Spot VM; custom VPCs enable advanced isolation.
Firewall rules manage inbound (ingress) and outbound (egress) traffic; they are stateless and can be global or instance-specific via tags. GCP denies all ingress by default for security, so explicitly allow needed ports to reduce risks—e.g., RDP on 3389 with restricted IPs, SSH on 22, HTTP/HTTPS on 80/443, and ICMP for diagnostics like ping.

In the VM creation wizard’s networking section, apply tags like http-server and https-server for basic web access (enabling predefined rules). Then, enable or create rules:
- Allow HTTP traffic (TCP
80) for unencrypted web. - Allow HTTPS traffic (TCP
443) for secure web.
In GCP VPC rules:

- For RDP: Allow ingress on TCP
3389from your IP range (or0.0.0.0/0for testing; restrict in production to prevent brute-force attacks). - For SSH: Allow ingress on TCP
22from trusted IPs for secure management. - For diagnostics: Allow ICMP from all or specific IPs for ping troubleshooting.
Most rules are default; ensure they are active and configured correctly.
Installing GNOME Core and XRDP
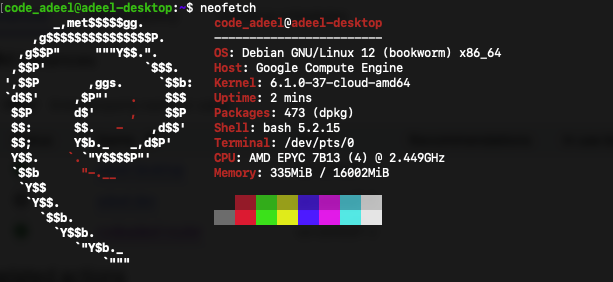
Connect to the VM via SSH (using GCP’s browser-based SSH or your terminal). First, set a password for your user (e.g., code_adeel):
sudo passwd code_adeel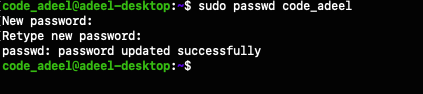
Enter and confirm a new password.
Update packages and install GNOME Core, XRDP, and dependencies:
sudo apt-get update
sudo apt-get install -y libgl1-mesa-dev libgtk-3-dev libglib2.0-0 gnome-core xrdp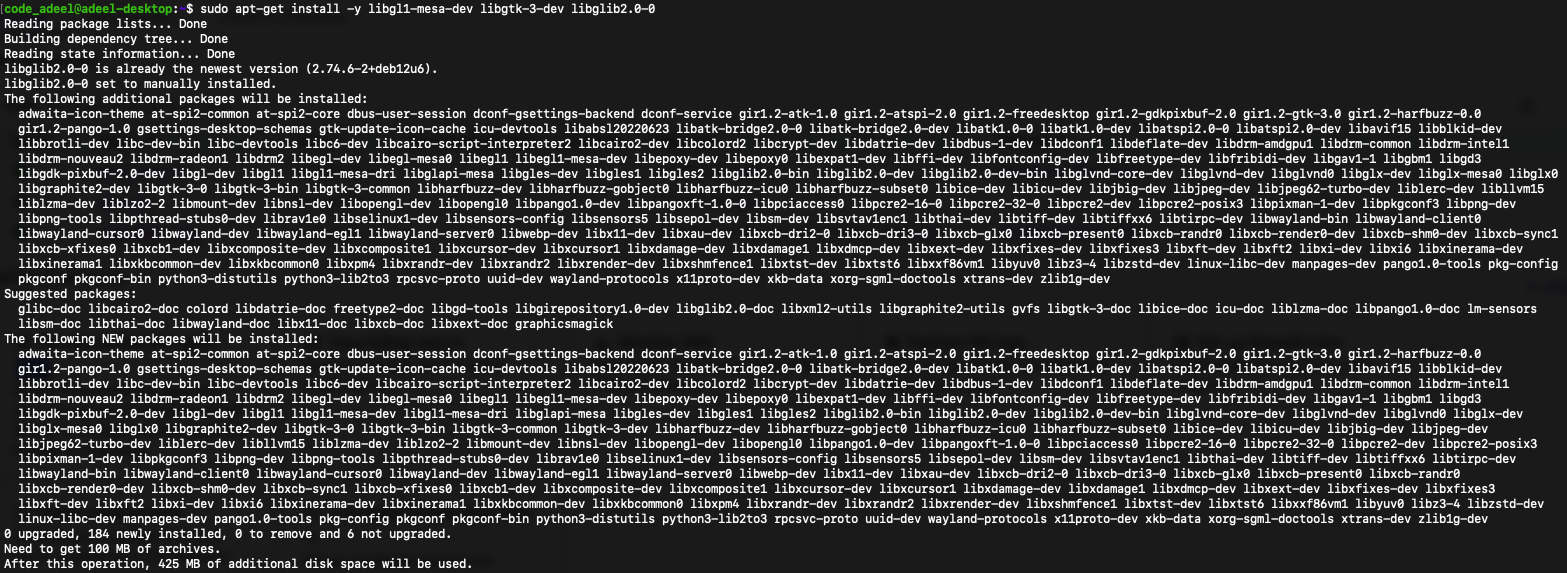
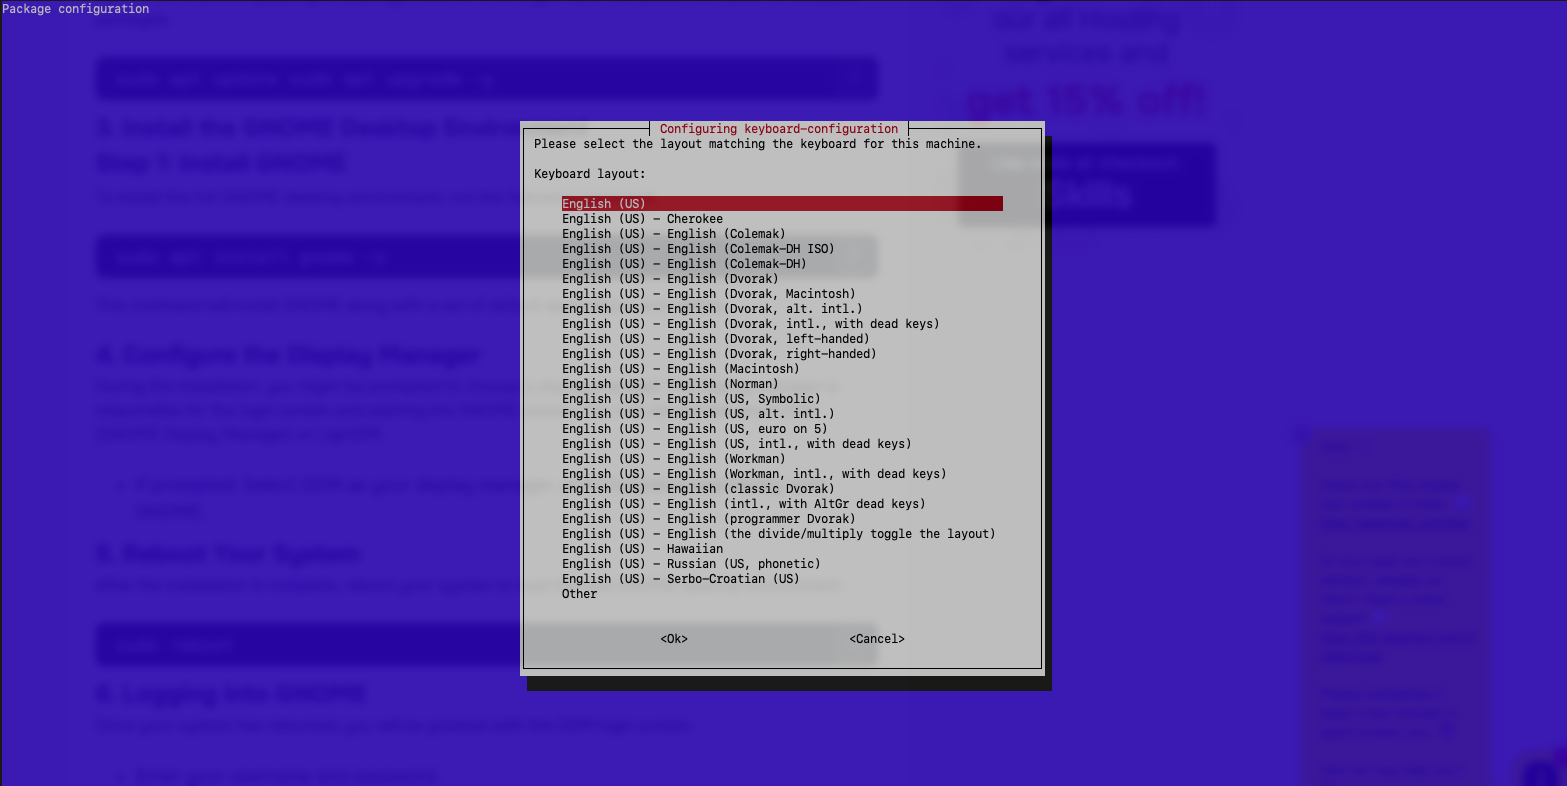
Installation may prompt for keyboard setup via TUI (Text User Interface):
Once complete, start the XRDP service:
sudo systemctl enable xrdp
sudo systemctl start xrdp
Configure the firewall to allow RDP traffic (if local firewall is enabled):
sudo ufw allow 3389/tcpConfiguring XRDP
XRDP configuration lets you adjust the remote desktop server’s behavior, including security, session types, and connection parameters. This ensures compatibility with GNOME and optimizes remote access performance.
Add your user to the SSL cert group for XRDP permissions on certificate handling during secure connections:
sudo adduser xrdp ssl-cert
echo "gnome-session" | tee ~/.xsession
echo "export XAUTHORITY=${HOME}/.Xauthority" | tee ~/.xsessionrc
echo "export GNOME_SHELL_SESSION_MODE=ubuntu" | tee -a ~/.xsessionrc
echo "export XDG_CONFIG_DIRS=/etc/xdg/xdg-ubuntu:/etc/xdg" | tee -a ~/.xsessionrc
The crypt_level setting in XRDP controls encryption strength for RDP data transmission, with options like none, low, medium, high, or fips—higher levels boost security but may slow performance due to extra computation. For faster streaming on low-bandwidth connections, optionally set crypt_level to none (reducing security); this is optional and only if performance outweighs encryption. Edit /etc/xrdp/xrdp.ini:
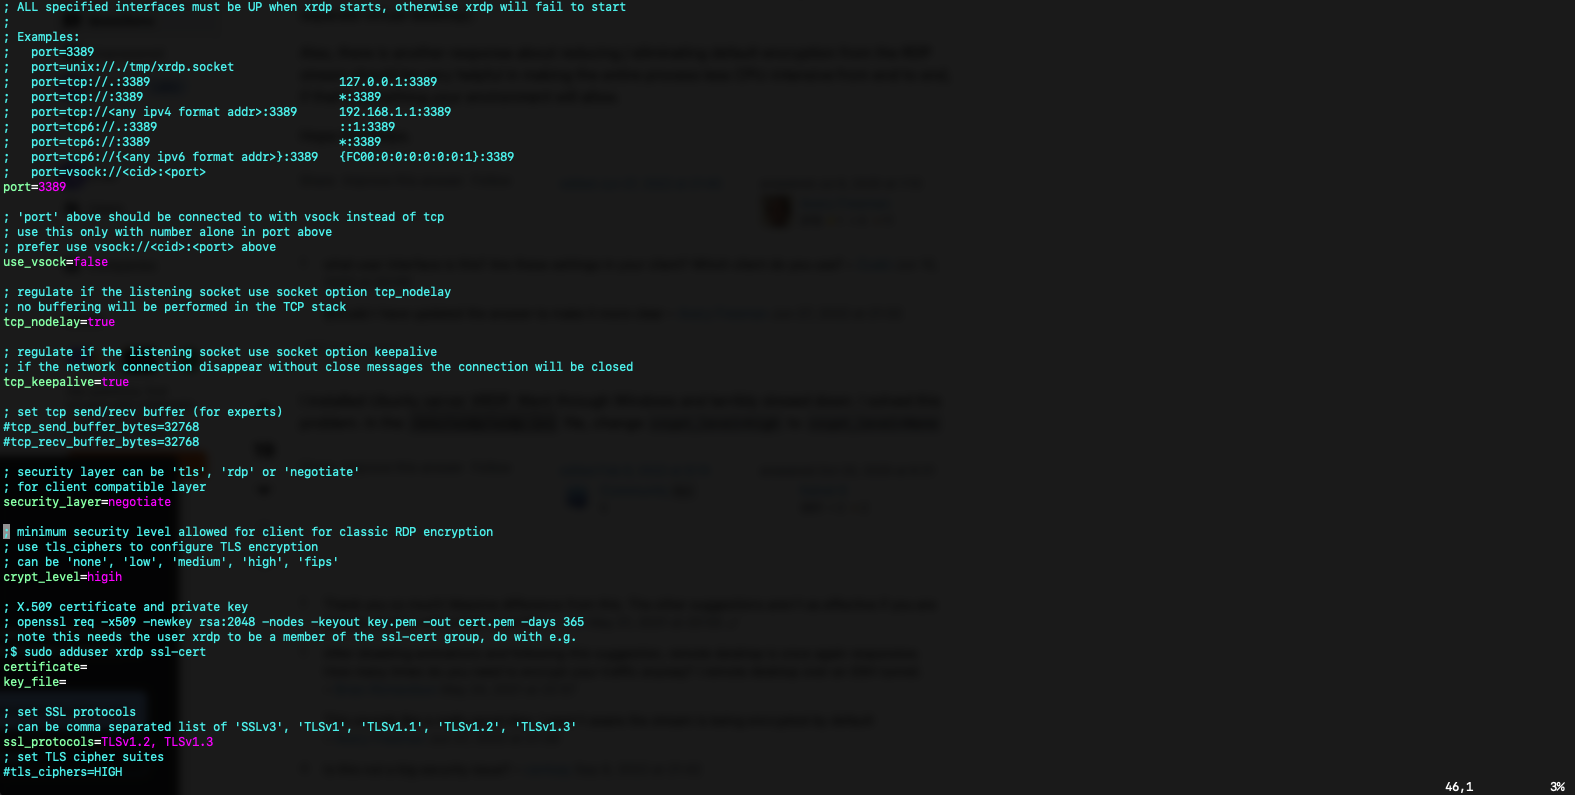
Sample config snippet:
[globals]
port=3389

...

security_layer=negotiate
crypt_level=none

...

[xrdp1]
name=sesman-Xvnc
lib=libvnc.so
username=ask
password=ask
ip=127.0.0.1
port=-1
Restart XRDP:
sudo systemctl restart xrdpConnecting via RDP Client
An RDP client connects to a remote RDP server, letting you control the graphical desktop of a distant machine over the network as if local. This enables seamless interaction with your GCP VM’s GNOME environment from your device. Use a client like Microsoft Remote Desktop (available on macOS, Windows, etc.).
Add a new PC connection with these settings:
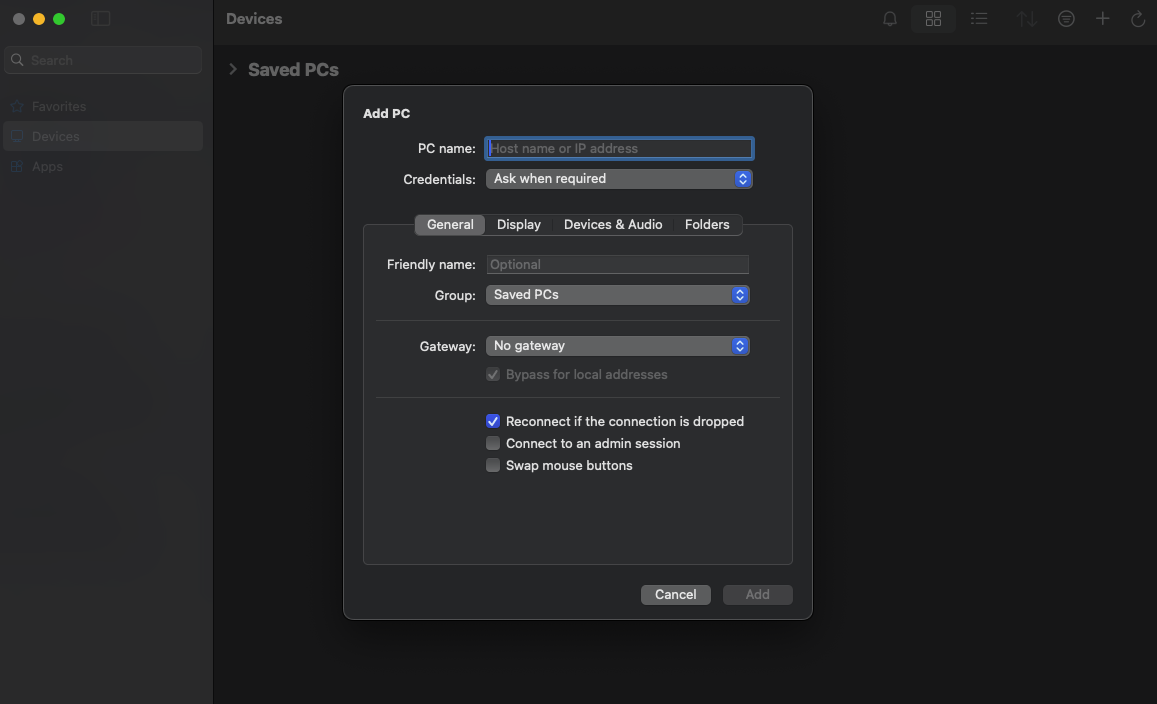
- PC name: Your VM’s external IP address.
- Credentials: Set to “Ask when required” to prompt for username and password on connection.
- Gateway: No gateway (unless using VPN or proxy).
- Options: Enable “Reconnect if the connection is dropped” for auto-recovery from interruptions.
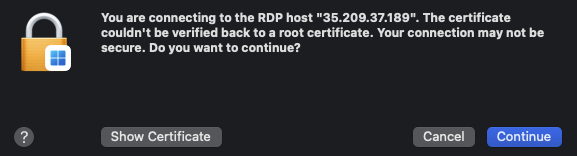
Accept any certificate warning to connect.
Note: If connection breaks immediately after login, reboot the VM.
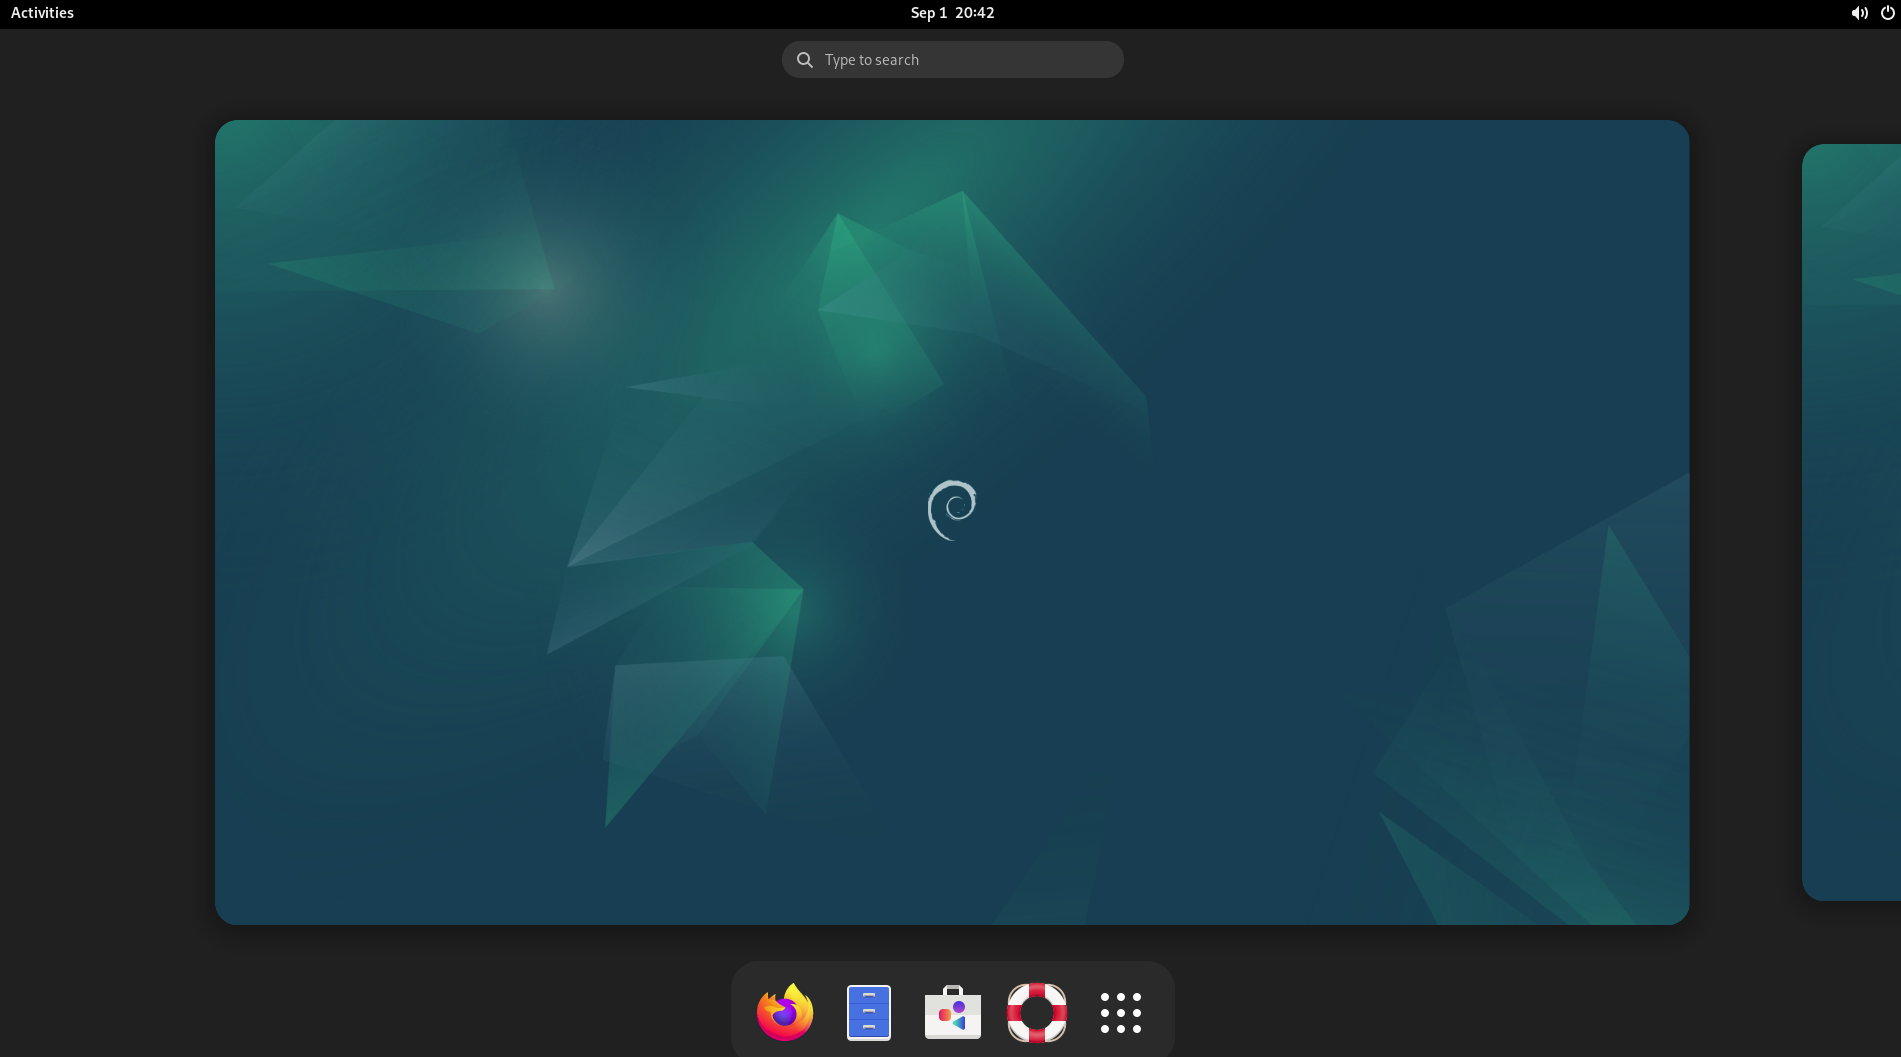
Initiate the connection. Enter username (e.g., code_adeel) and password, then select Xorg as session type to launch GNOME desktop.
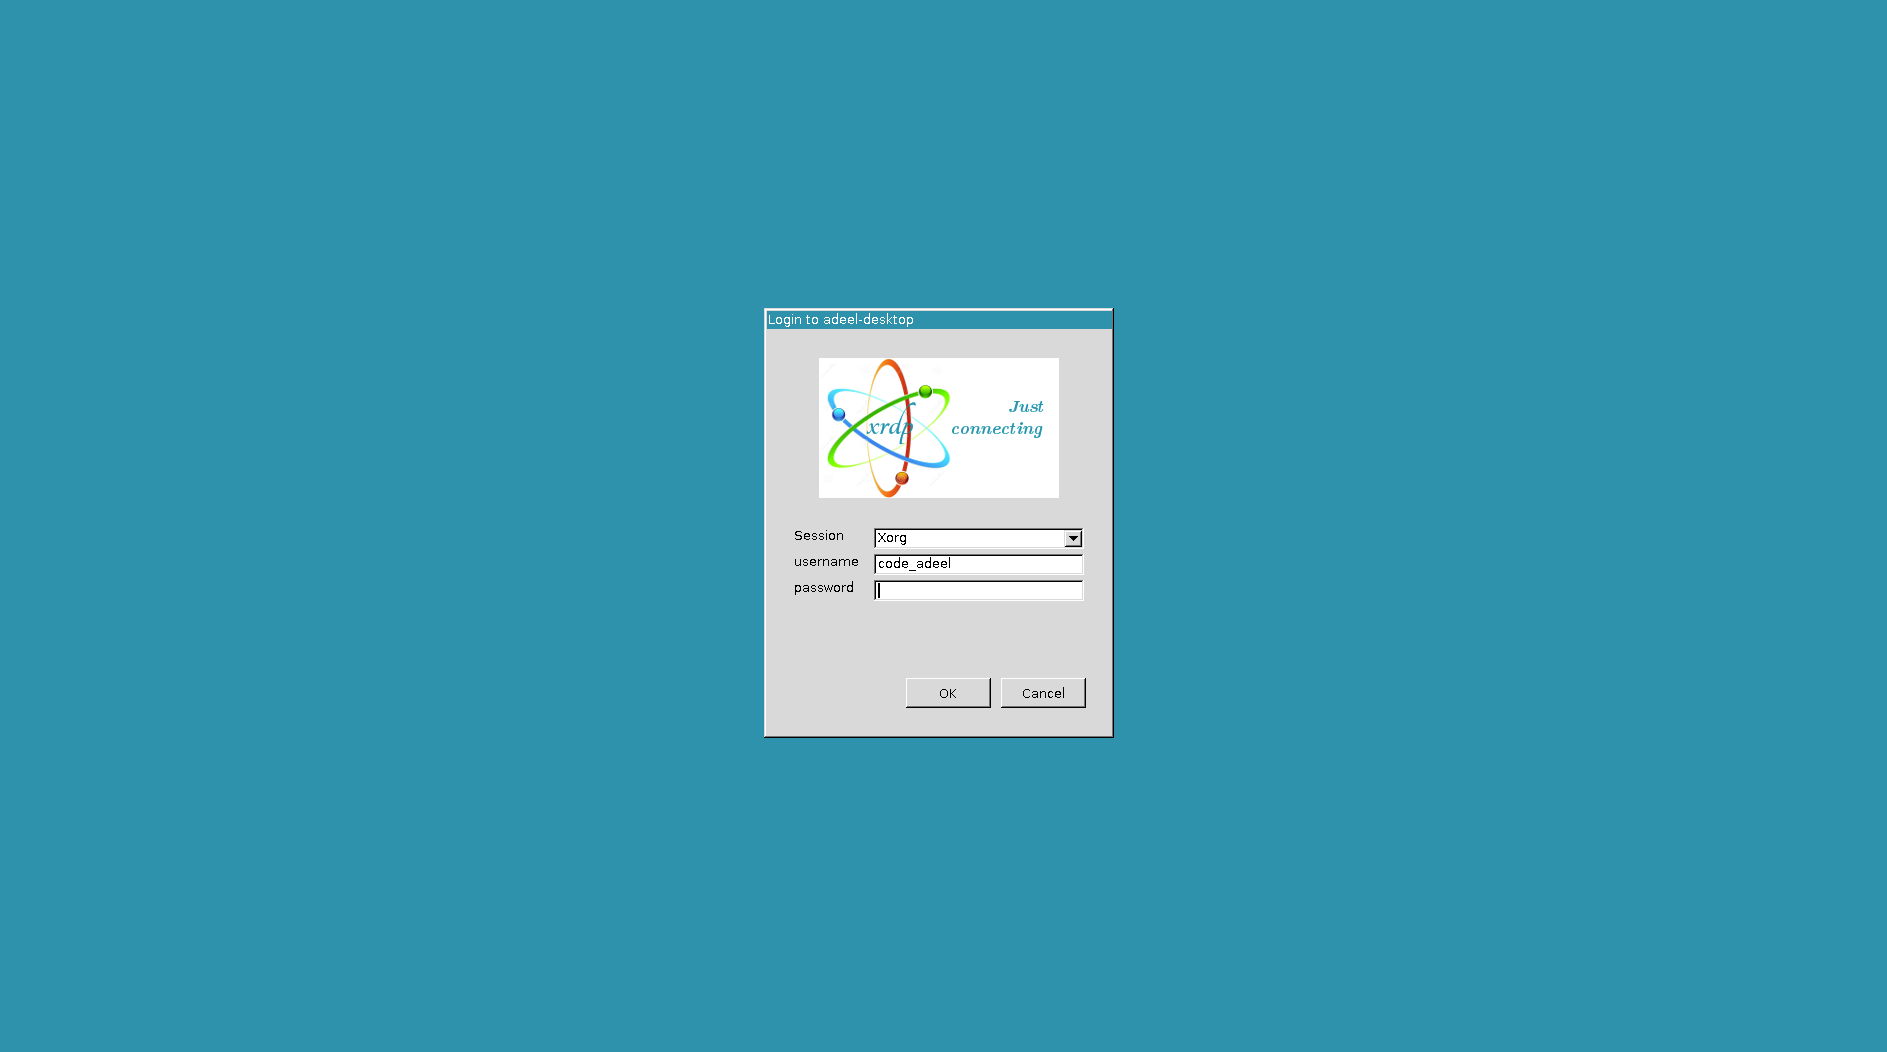
On success, access the GNOME desktop. Test features like opening a terminal or installing tools via apt.
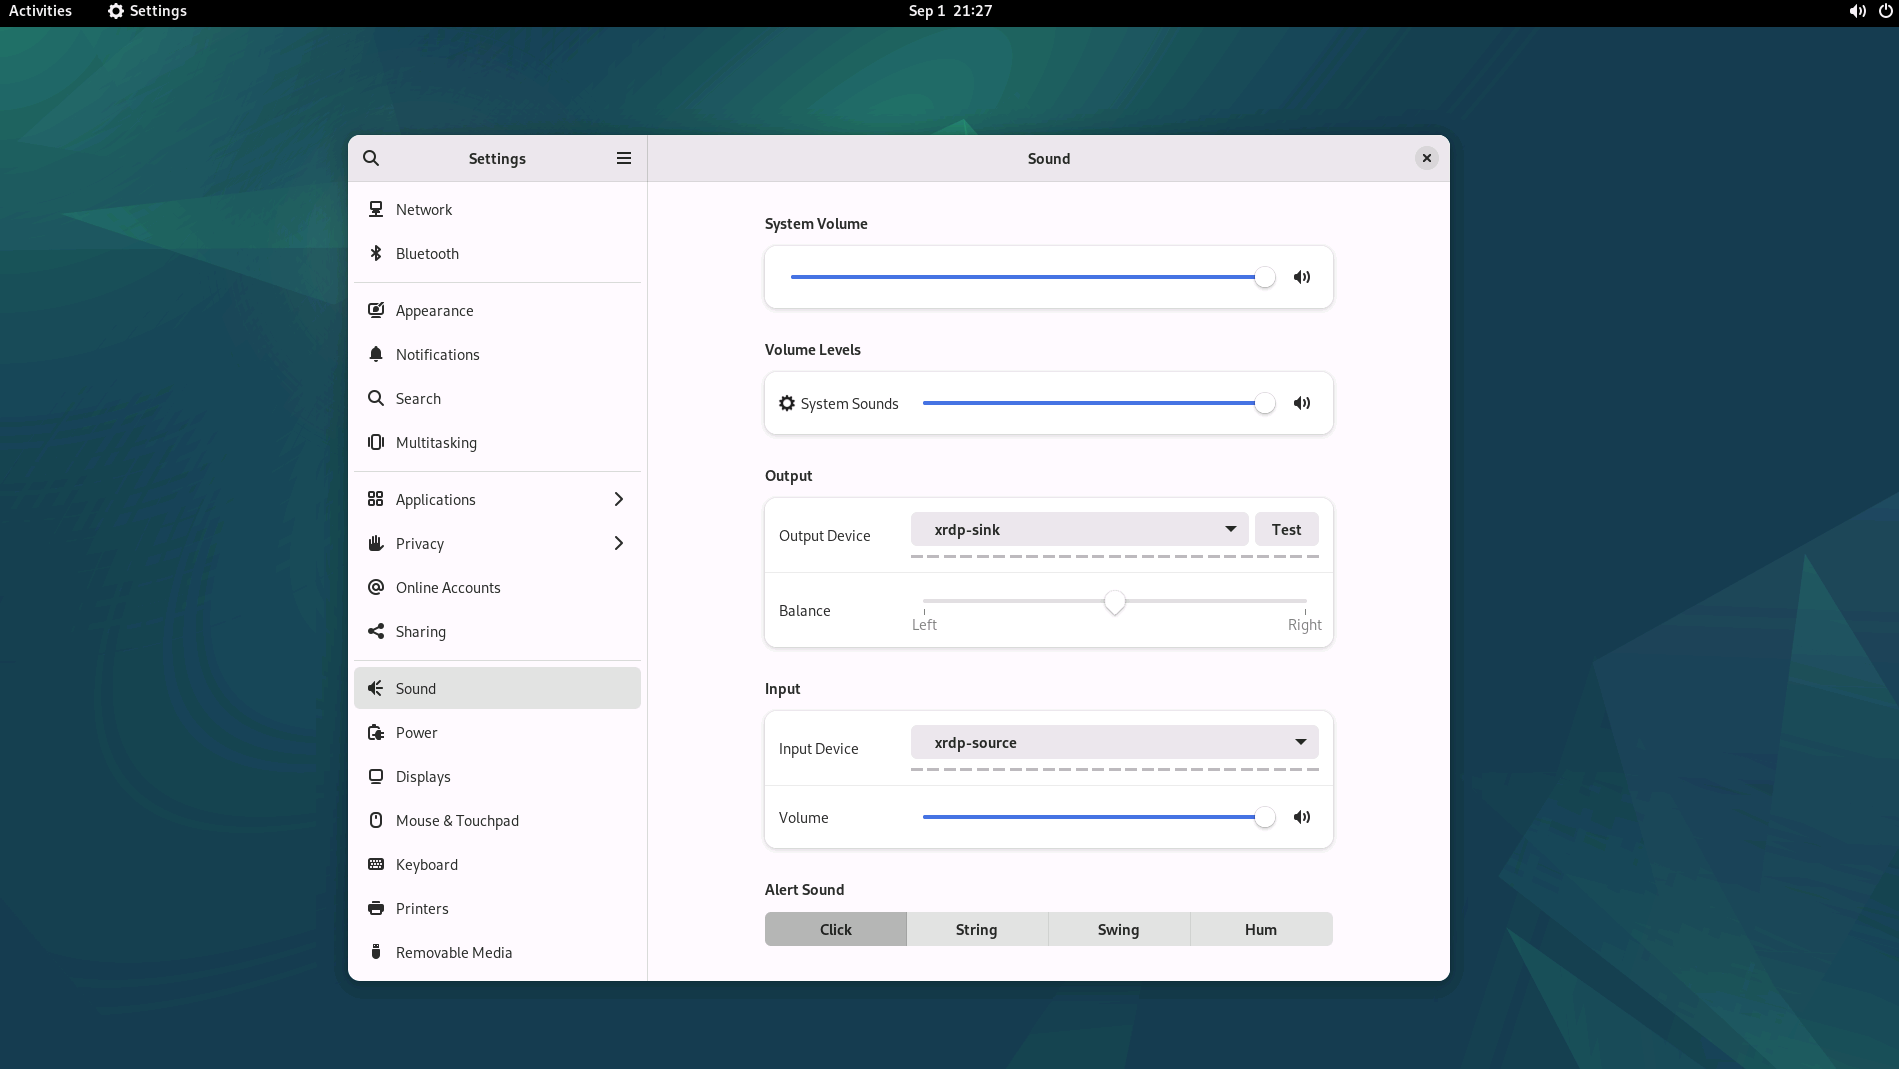
[Optional] Adding Audio Support
Enabling audio in XRDP redirects sound from the remote GNOME desktop on your GCP Debian VM to your local client. Useful for multimedia, video, or audio apps. XRDP lacks default sound redirection, but add it by compiling PipeWire modules for XRDP. Assumes XRDP is installed.
Install PipeWire dependencies:
sudo apt-get update
sudo apt-get install git pkg-config autotools-dev libtool make gcc libpipewire-0.3-dev libspa-0.2-dev pipewire
Download and build source:
git clone https://github.com/neutrinolabs/pipewire-module-xrdp.git --recursive
cd ./pipewire-module-xrdp
./bootstrap
./configure
make
sudo make install
Reboot the VM after installation.
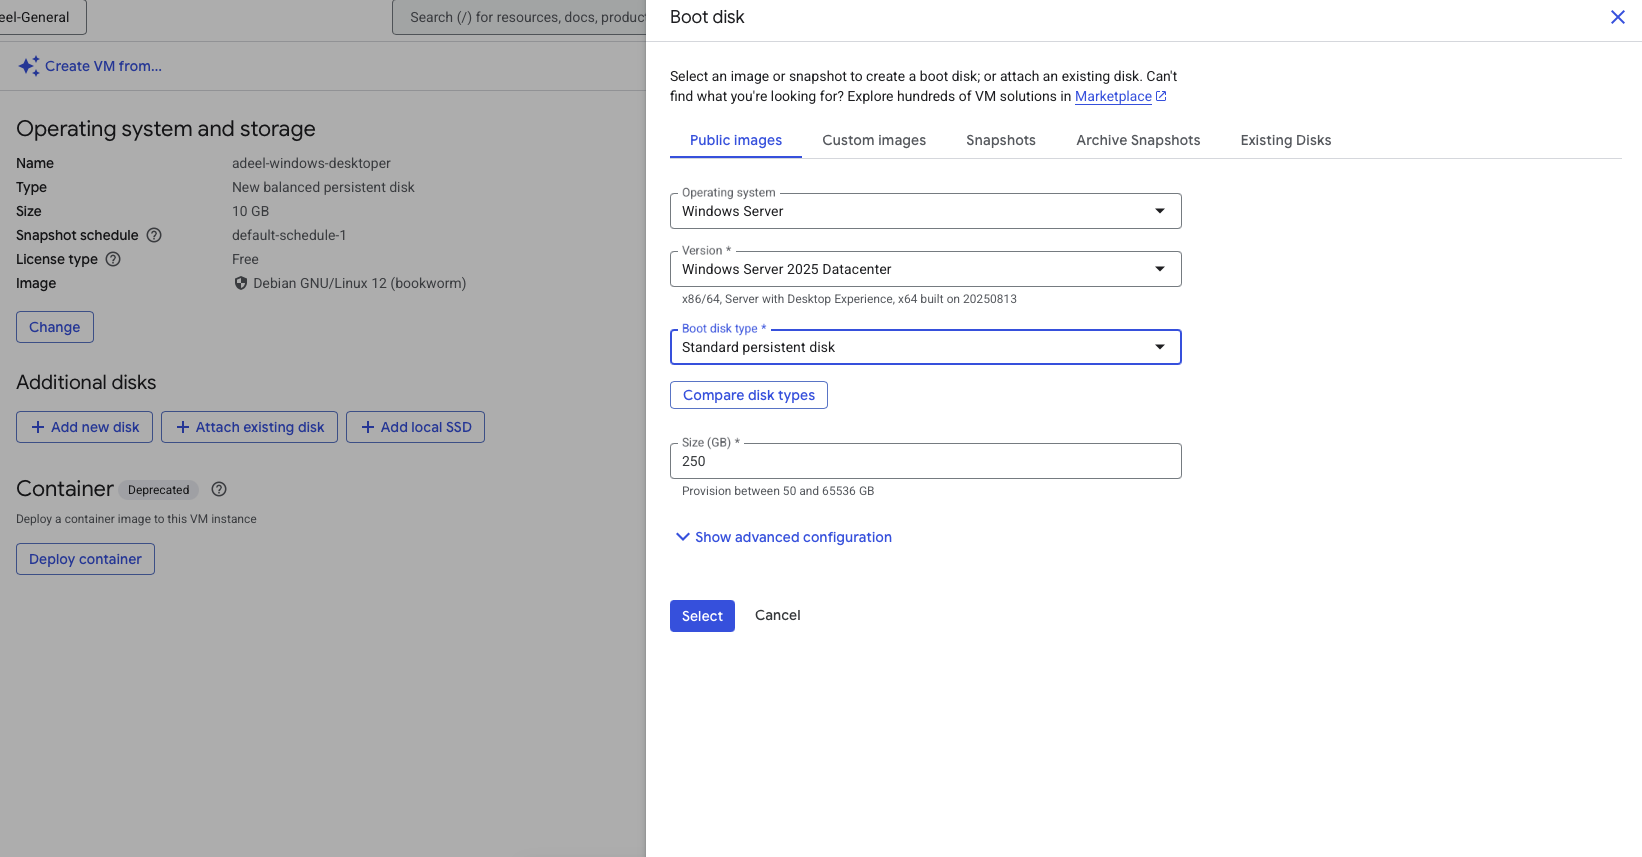
[Optional] Running Windows Server
As an alternative to Linux-based setups, you can run Windows Server on a GCP VM using standard (on-demand) or preemptible (Spot) provisioning models, providing a native Windows environment with built-in RDP support for users needing Windows-specific applications—Spot VMs offer cost savings but risk preemption, making them ideal for non-critical workloads. During VM creation in the GCP Console, select a Windows Server boot disk (e.g., Windows Server 2022 Datacenter), noting that it incurs separate license fees billed per-core per-hour in addition to compute costs, so check the estimated pricing for your region, machine type, and edition. Unlike Debian, RDP is pre-configured by default, with GCP handling initial setup automatically.
After launching, wait 3-4 minutes for internal Windows provisioning (like sysprep) to complete, then access VM details in the Compute Engine console.

Now in GCP VM Console:
- Set up a Windows RDP password: In the VM instance page, click
Set Windows passwordto generate or reset credentials for the default administrator account. - Download the RDP file: From the same section, click
Download the RDP fileto get a pre-configured.rdpfile for your client.
Use this file with an RDP client (e.g., Microsoft Remote Desktop) to connect using the provided username and password. You’ll gain direct access to the Windows desktop, ready for use. For security, ensure your firewall rules allow ingress on TCP port 3389, restricted to trusted IP ranges.
Conclusion
Setting up a remote desktop on Google Cloud Platform using a Debian Spot VM with GNOME Core and XRDP provides an affordable, flexible solution for accessing a Linux graphical environment from anywhere. This approach leverages Spot VMs for significant cost savings while ensuring secure and efficient remote access via RDP. For those preferring a Windows ecosystem, the optional Windows Server setup offers native RDP support with minimal configuration. Whether for development, testing, or personal use, these methods demonstrate GCP’s versatility in handling desktop workloads. Remember to monitor for preemptions in Spot instances, secure your firewalls, and consider persistent storage for data durability. Experiment with these setups to optimize for your needs, and explore GCP’s scaling options for more advanced deployments.